
Mette Nielsen | 12/08/2022
Best practices: formatting images for web
Articles with an image for every 75-100 words were shared twice as frequently on social media compared to those with fewer images.
People remember pictures better than words. This phenomenon is called the Picture Superiority Effect and most of us are aware of just how true it is, even if subconsciously.
Well formatted images can improve your website’s appearance, user experience and ranking on search engines. Poorly formatted visual content can have the exact opposite effect. It can slow down your page speed and harm the user experience.
In this article we will go through the best practices for using images to make your website look professional.
Choosing the right file format
Choosing the right format for your image is the first step to making sure a picture looks its best on your website. The most common image formats for web are PNGs and JPEGs, but a new format called Webp is also an option. Here is a rough guide on which formats might work for you:
- JPEG: Photos of real-life objects are usually saved in this format. JPEGs result in a smaller file size so work better for complicated images with lots of details that otherwise would be too large if saved as PNG.
- PNG: Graphics, such as illustrations and icons should be saved as PNGs. PNGs are higher quality than JPEGs, but usually result in a larger file size. PNGs also support transparent backgrounds which is useful for icons and logos.
- Webp: Webp is a fairly new format put out by Google. It has the benefit of being even more compressed than PNG and JPEG while retaining its image quality.
Online tools such as Imageresize.org or tinyjpg.com let you compress your images and save them in your chosen format. You can use tools such as cloudconvert.com to convert your files to other formats.
Here is the same image, in the exact same size, using the three different formats:

This is a JPEG image

This is a PNG image

This is a Webp image
One or the other may load slightly faster, or appear slightly different depending on your internet speed and browser.
How big should your image be?
When considering the “size” of an image, there are three categories to keep in mind:
- File size: This is how much space your image takes up on the server in kilobytes. Consequently, file size determines how quickly or slowly your image loads on the page. Large images can slow down your website. A good file size for web is 100-500kb.
- Image resolution: The bigger the number of pixels, the higher the resolution and the larger the file size also typically is. Images smaller than 1500px may appear blurry. You may need a resolution of 2500px if using the image for a Hero or a full-width banner. Favicons are typically 64x64 px while logos are typically 300x300 px.
- Aspect ratio: The relationship between the height and width of an image constitutes the image’s aspect ratio. A 1:1 aspect ratio is used to signify a perfectly square image, for example, with the same width and height.
Keep reading for a deeper dive into these three size categories.
File size
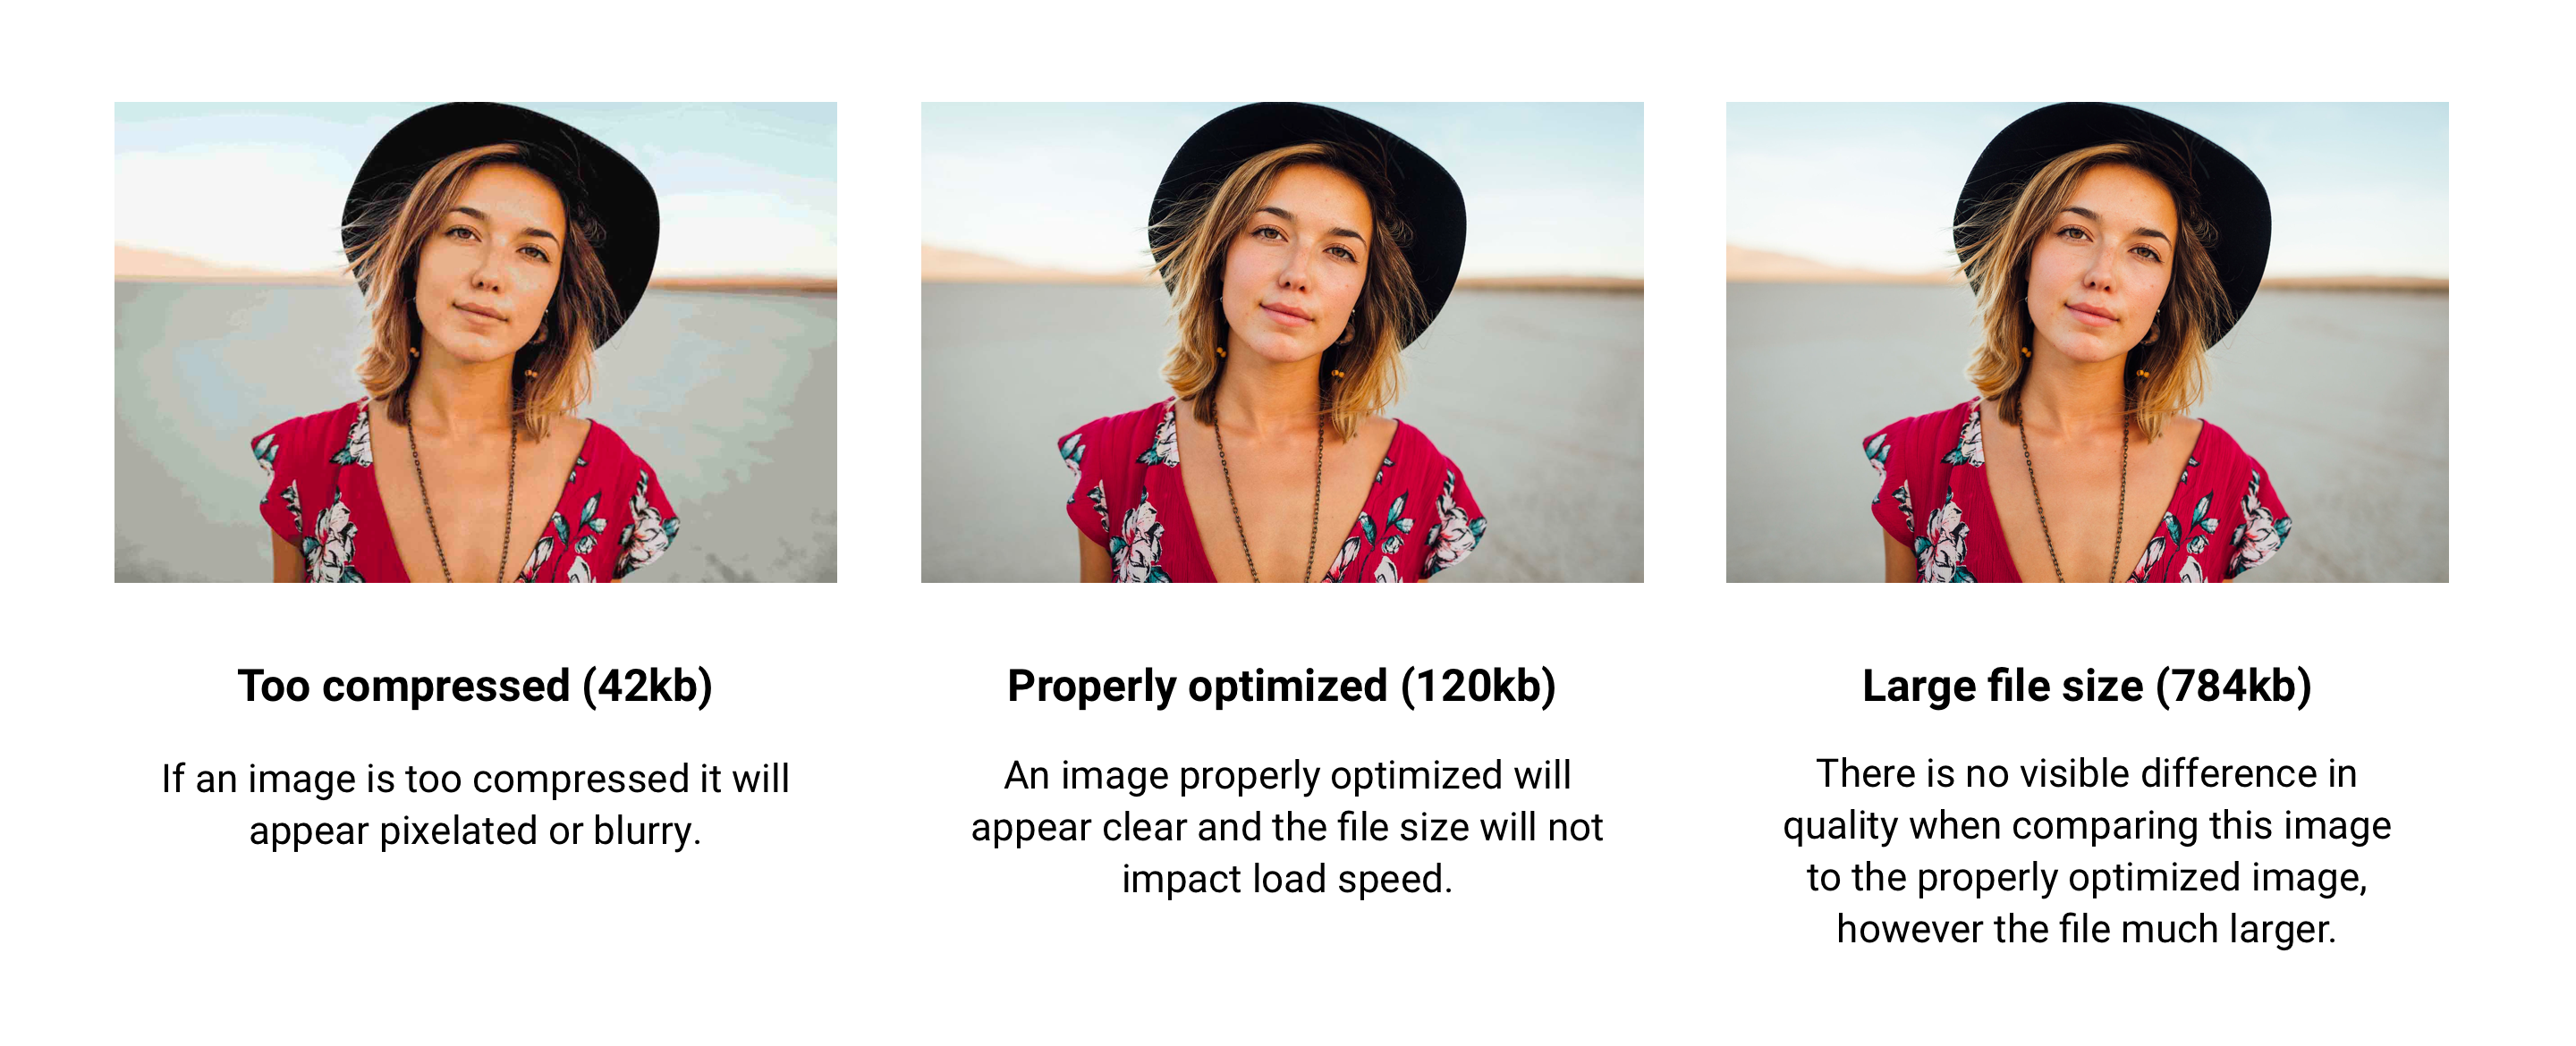
You don’t need huge images in order to get good quality.
Large images take longer to load than smaller ones and don’t necessarily result in better quality. On the contrary, slow load times and hurt the user experience and have the exact opposite effect. Go for the smallest possible file size without compromising on quality. See this example:
Online tools such as Imageresize.org or tinyjpg.com let you compress your images and save them in your chosen format. You can use tools such as cloudconvert.com to convert your files to other formats.
Image resolution
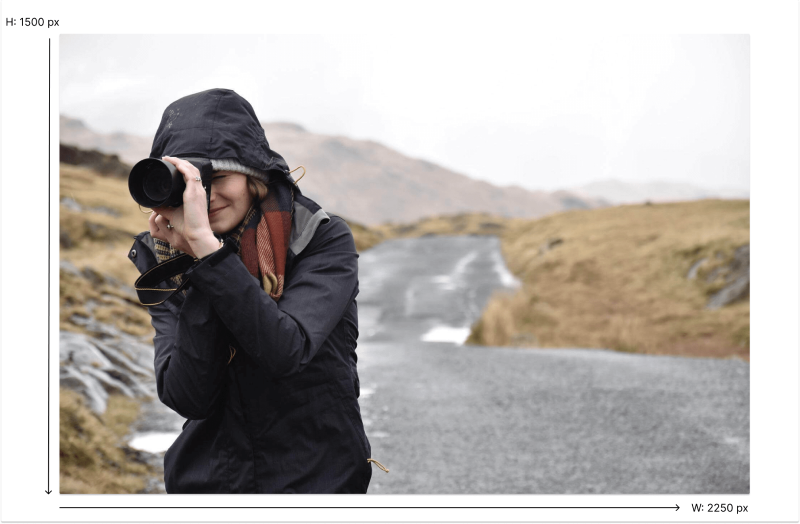
A picture’s resolution refers to its size in pixels. For reference, many industry-standard screens have a 1080p resolution, meaning that the screen is 1080 pixels in height (and 1920 pixels in width).
Many stock images are available in resolutions closer to 4000p which is unnecessary in most cases. Most often a 2500px resolution will work well on the web.
You can use a tool such as imageresize.org to change the resolution. You can also simply open your image in Microsoft Paint or Figma and change the size values.
In the gif below you can see how we change the resolution to 600x400 px. This size is sometimes sufficient for thumbnails and small images on the website that are not supposed to be full screen.
As mentioned above, Favicons and logos also typically are required in smaller resolutions. Favicons are typically 64x64 px while logos are typically 300x300 px.
Note that you can only decrease the resolution, not increase it. Trying to increase the resolution of picture would mean that your software would have to guess how to fill in the extra pixels. The extra pixels would not yield a realistic amount of detail and the result would appear blurry.
Aspect ratio
The aspect ratio of an image is the relationship between height and width. An image can for example be square or rectangular. It can be horizontal or shaped like a portrait. The aspect ratio makes a big difference to how the image appears on a website.
Mono’s website builder automatically crops images to fit into the aspect ratio set by the module or column design you are using – however if you haven’t edited the image to the correct shape beforehand, it may be cropped or reshaped in the wrong spot.
This is especially important If you have a gallery or a blog with pictures next to each other, where it is important that they appear the same.
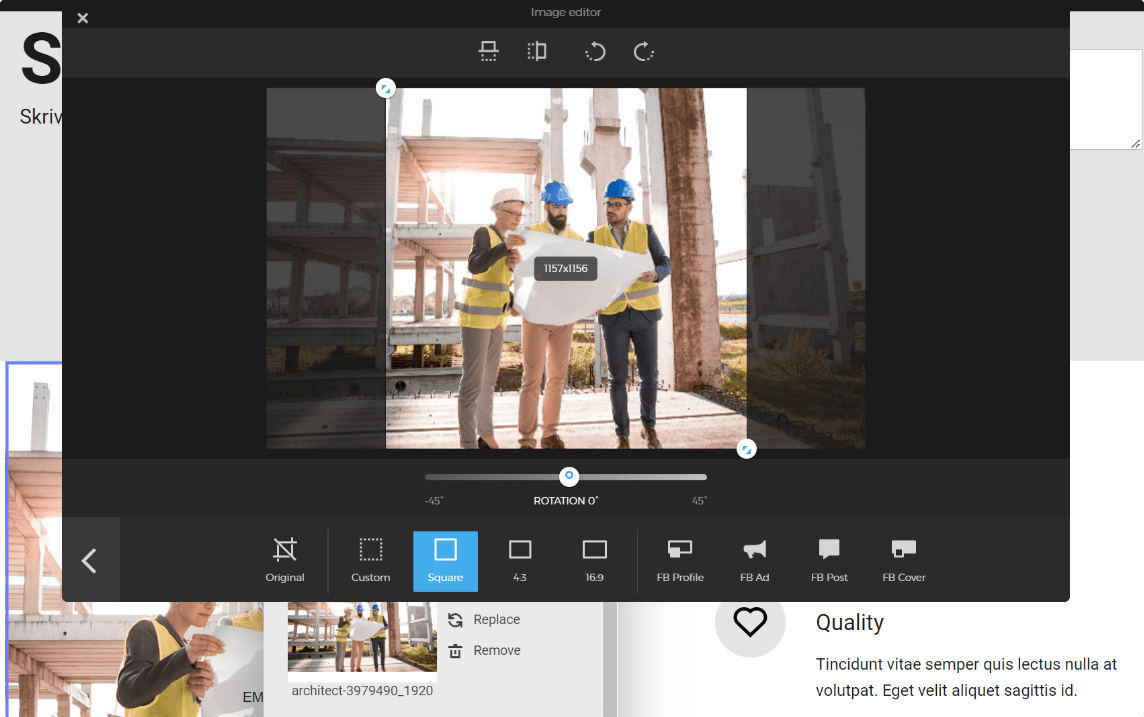
An easy way to crop your image, if you are using the Mono Editor, is to use the built-in image editor. It allows you to choose between popular aspect ratios.
You can also crop your image using online tools such as Figma or Adobe Express image cropper by signing up for a free account.
Cropping can make a huge difference especially when it comes to banners and heros. Finding the right aspect ratio for your full width images can change the look of your page.
Naming an image file for SEO
Image file names are used by search engines to understand what your image, and in extension your content, is about. Another interesting reason to focus more on image names is that Google Image Search now makes up 20% of traffic through search engines.
SEO image naming conventions
Using keywords as a file name can help search engines understand what your image is about.
A key phrase for this article could be: “How to format images for web.”
Organise your chosen keywords or phrase into a URL format that leaves out unimportant words.
For example: how-format-images-web.png.
If the image is related to something specific, you can add an extra word. The image below could for example be titled: how-format-images-web-seo.png.
Avoid keyword stuffing
Keyword stuffing is the practice of loading too many keywords into your content. This stands out to search engines as fake or not legit. They will spot that behaviour and punish it with lower rankings. After all, the purpose of search engines is to connect their users with high quality and relevant content.
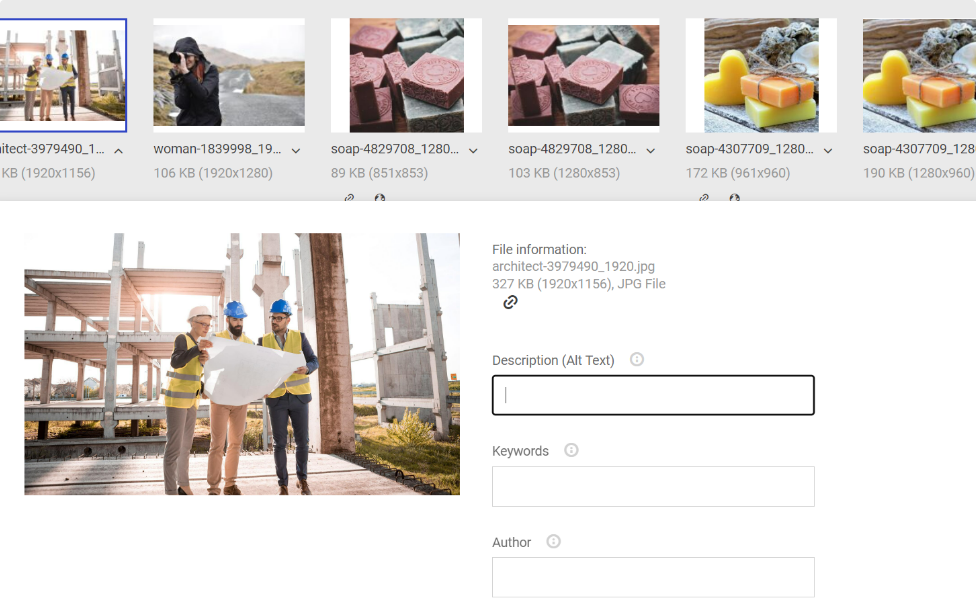
The next step would be to add alt tags and image keywords to the image. If you’re using the Mono Editor, you can add this easily in the File Manager as seen below:
Wrapping up
Images are an essential part of any modern website. Formatting them correctly will help you get the most professional result for your own and your customers’ websites.
About Mono
Mono was founded on the belief that all small businesses deserve the same level of online presence and performance as larger companies. With Mono platforms and products, we want to provide resellers with an all-in-one solution to build and manage customer websites. Get a demo here.